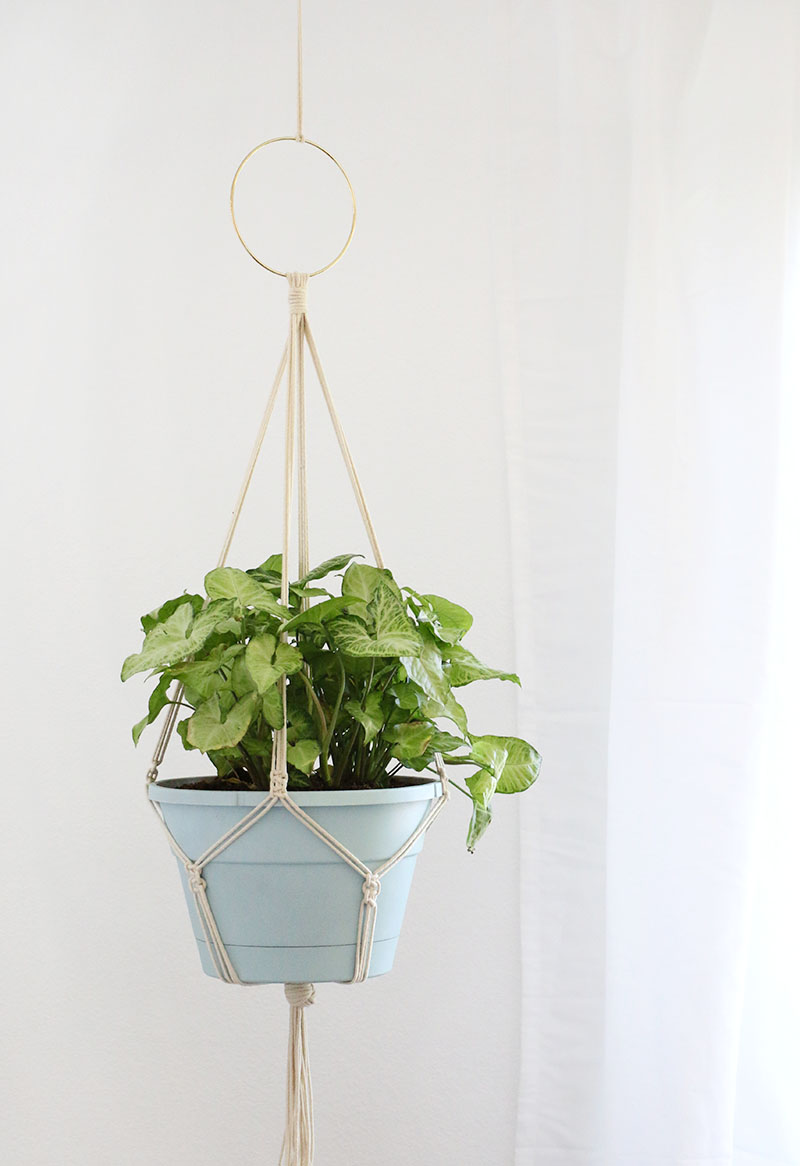
HOW TO MAKE A DIY MACRAME PLANT HANGER
DIY MACRAME PLANT HANGER SUPPLIES:
- 3mm Natural Cotton Macrame Cord
- 6 in Gold Metal Ring (or whatever size you like)
- Pot with Tray (I spray painted mine a robin’s egg blue with a matte spray paint designed to work with plastic)
- Scissors
- Miracle Gro Expand ‘N Gro
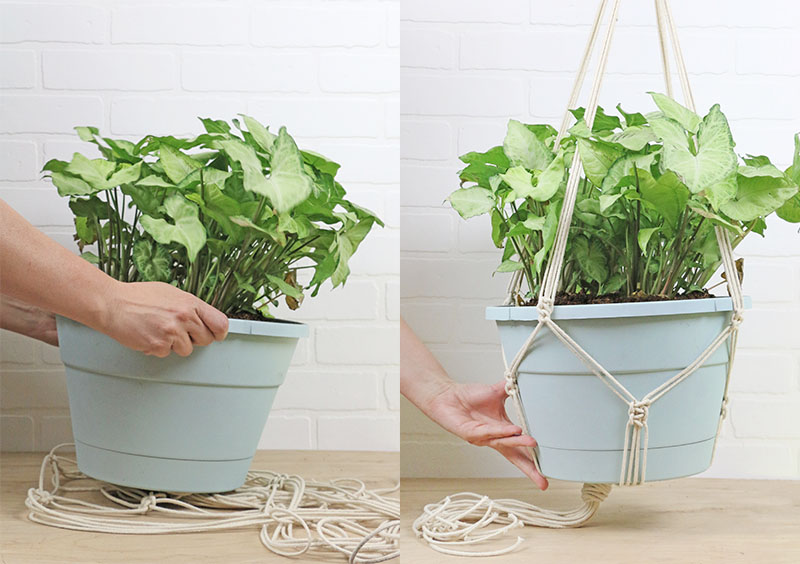
STEP ONE. MOVE PLANT TO NEW POT.
Start by getting your plant situated in it’s new pot.

When your plant is happy in it’s new pot you are ready to start your macrame project. I have done a few macrame projects in the past, but I’m certainly no professional, so this little hanger is definitely a project anyone can tackle. I really only used two types of macrame knots to make it, and I really like it’s simple look.
STEP TWO. CUT CORDS.
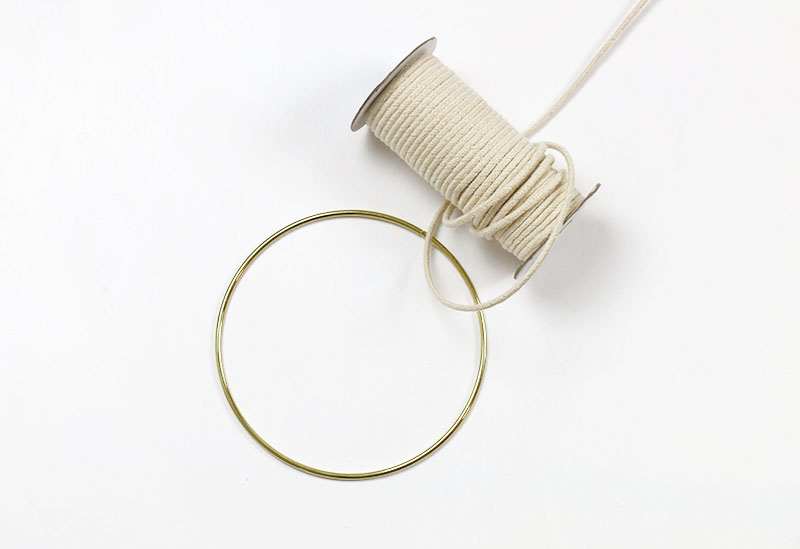

You will start your DIY macrame plant hanger by cutting 8 long pieces of the cotton macrame cord. For my hanger I cut my pieces to be 10 feet long each. This turned out to be just about the right length. My planter is a bit on the larger size, so if you are working with a smaller pot, your pieces could be shorter. Once you have your 8 long strands, loop them through the gold hoop making sure they fold over the hoop at the mid point. You will now have 16 long pieces of cord hanging down from the hoop.
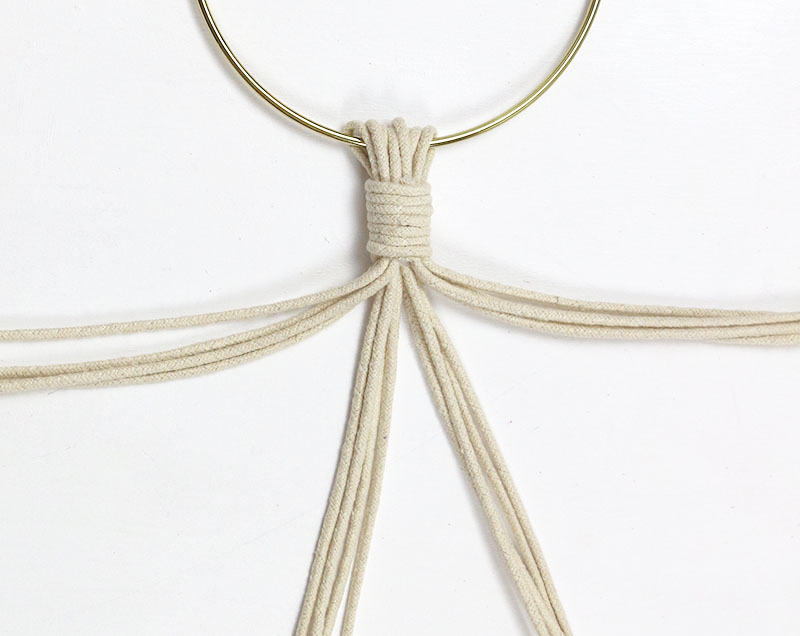
STEP THREE. WRAPPED KNOT.
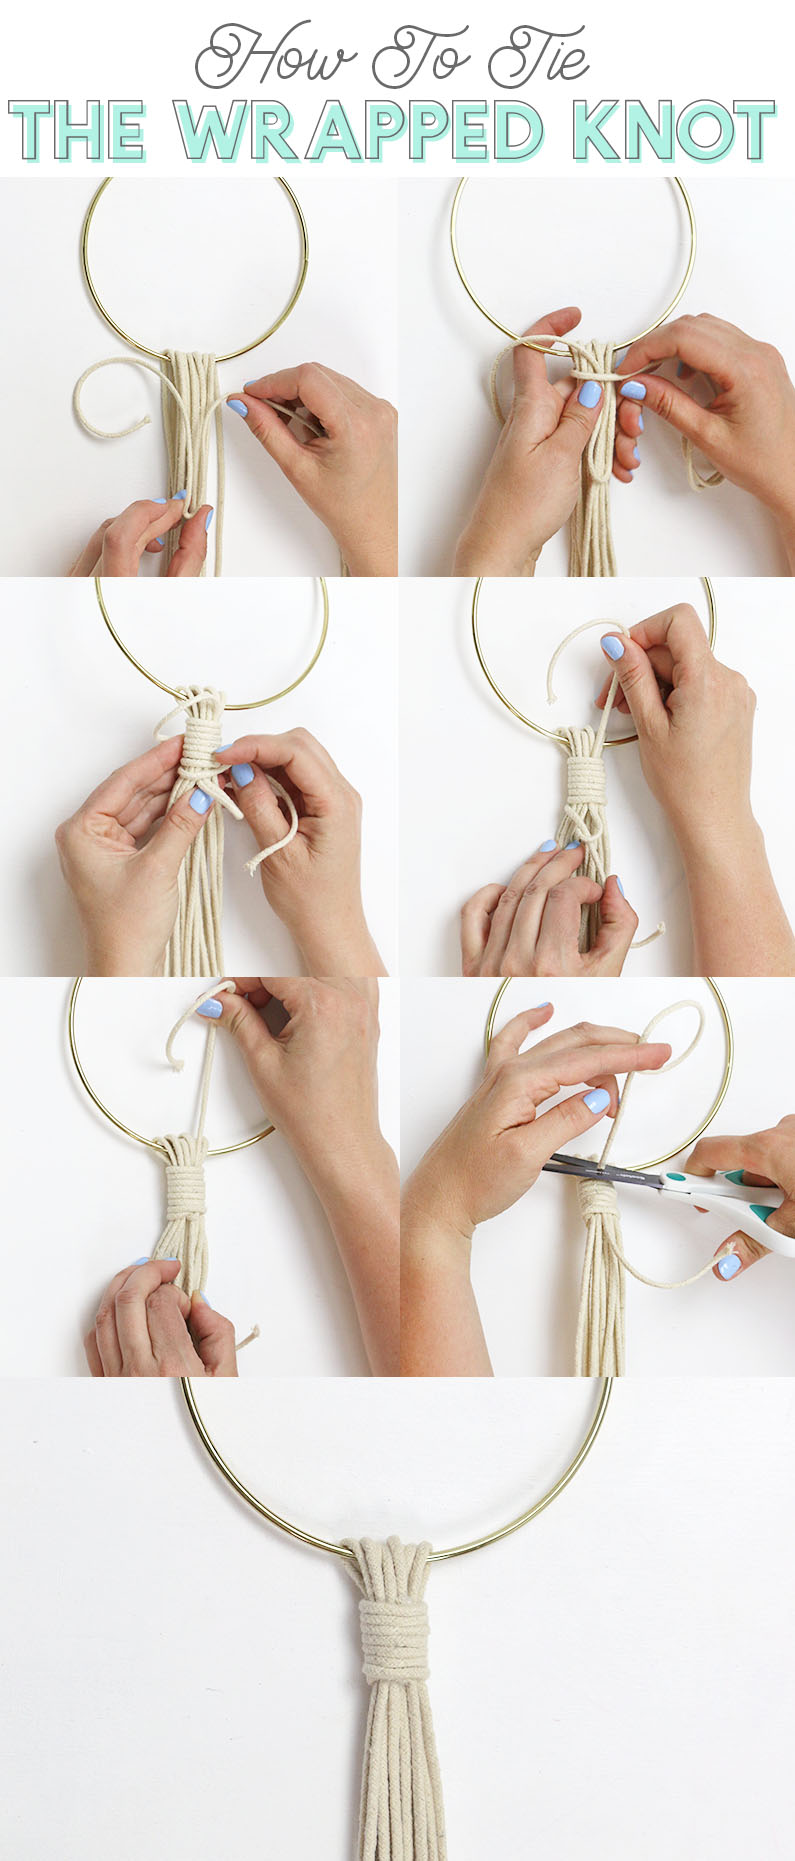
HOW TO TIE THE MACRAME WRAPPED KNOT
- Place the short cord over your looped cords with the short tail to the left, a loop pointing down, and the long tail to the right.
- Wrap the long tail around the looped cords and the loop of the short cord.
- Continue wrapping the long tail, pulling tight and leaving the bottom loop of the short cord uncovered.
- When you are happy with the length of your wrapped knot, thread the long tail through the loop at the bottom.
- Pull up on the short tail to tighten the knot and pull it underneath the wraps.
- Clip the tails as close to the knot as possible.
And that’s it! I love how easy this knot is to do and how pretty it looks when finished. I know I will be using this in the future for tassel making.
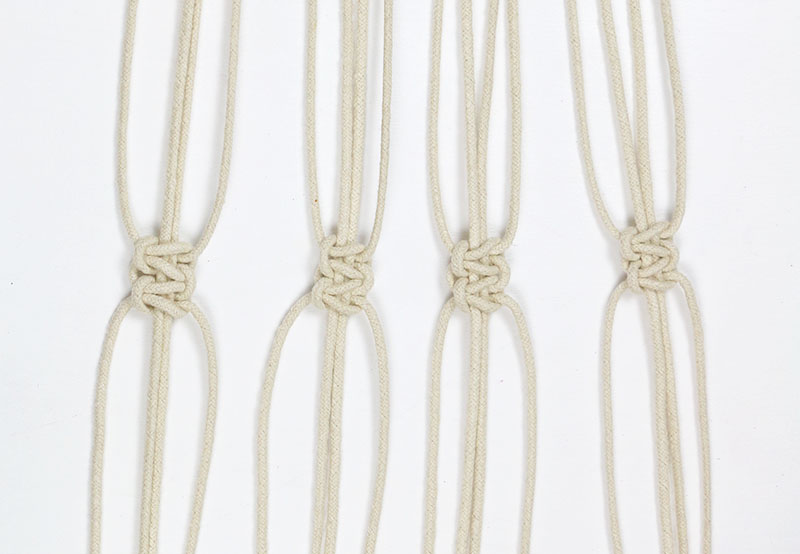
STEP FOUR. FIRST ROW OF SQUARE KNOTS.
Next up, we will do a row of square knots. Start by dividing your 16 long strands into four groups of four strands each.
We will work two square knots over each of these four groups. To get them evenly spaced around the planter, I used a measuring tape and measured the same distance from my wrapped knot along each group of cords and marked it with a pencil. For my hanger, I measured 20 inches for my first row of square knots. Each group of four strands needs to be separated into the two outer cords that will be used to tie the knots and the two center cords that the knots will be tied over.
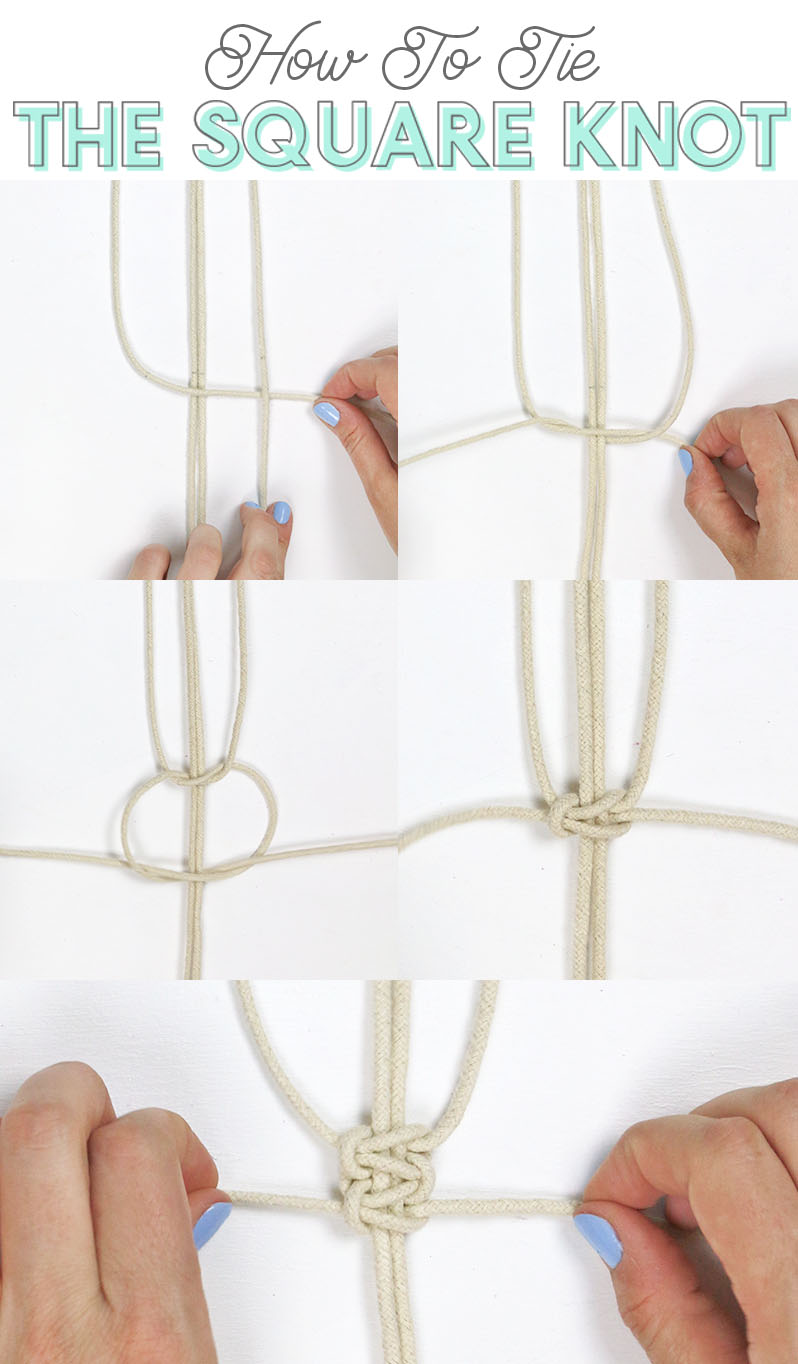
HOW TO TIE THE MACRAME SQUARE KNOT
- Lay the left cord over the center cords and under the cord to the right.
- Thread the right cord under the center cords and up over the cord on the left. Pull to tighten, lining the knot up with your measuring mark.
- Repeat this process going the opposite direction: Lay the right cord over the center cords and under the cord to the right. Thread the left cord under the center cords and up over the cord on the right.
- Pull to tighten. Square knot formed.
- Repeat to create two square knots.
Follow these steps to create two square knots over each four strand group at the same distance from the wrapped knot.
STEP FIVE. SECOND ROW OF SQUARE KNOTS.
Next, we will make another row of square knots a bit below our first row. These knots will be made over new groups of four strands. You will take two cords each from adjacent groups of four – one center cord and the right from one and one center cord and the left from the other. Measure how far below the previous row of knots you want these next knots to be. I decided that about five inches lower would look good on my planter.

Next, tie two square knots at the measured mark over these new groups of four strands.

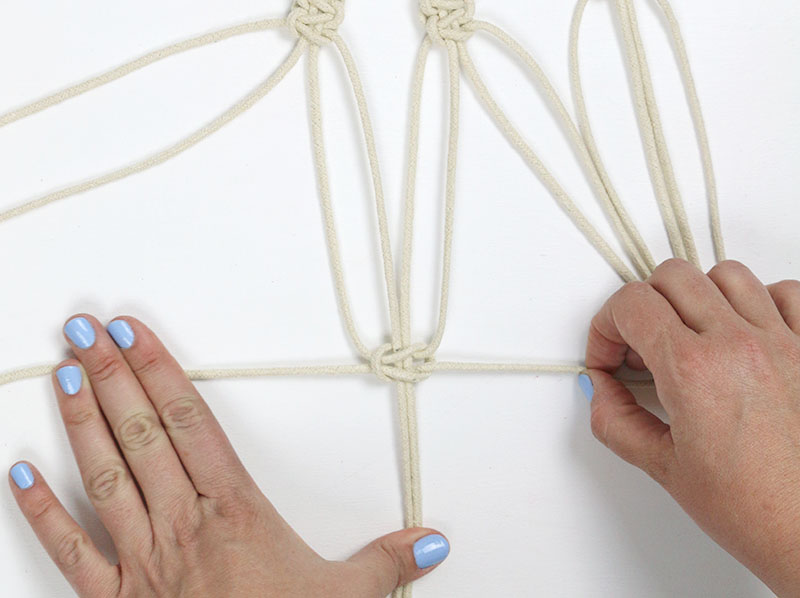
At this point, your work will be forming a kind of tube, so you will have to flip your work over to tie the final group of four strands.
STEP SIX. KNOT AND TRIM TO FINISH.
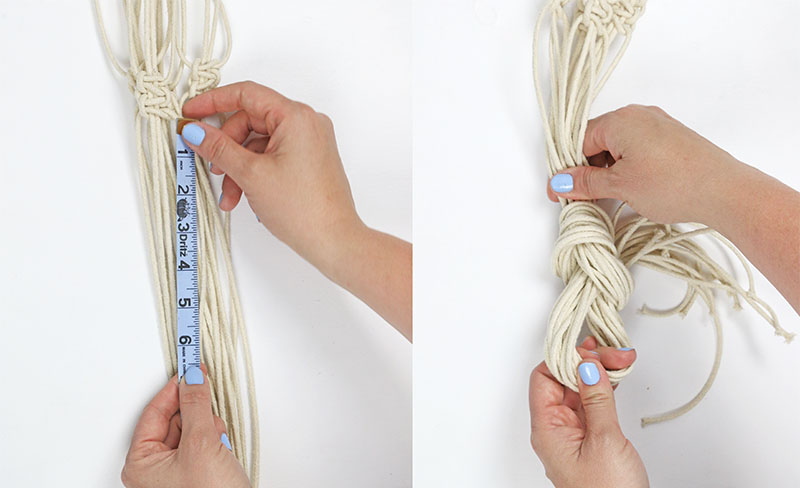
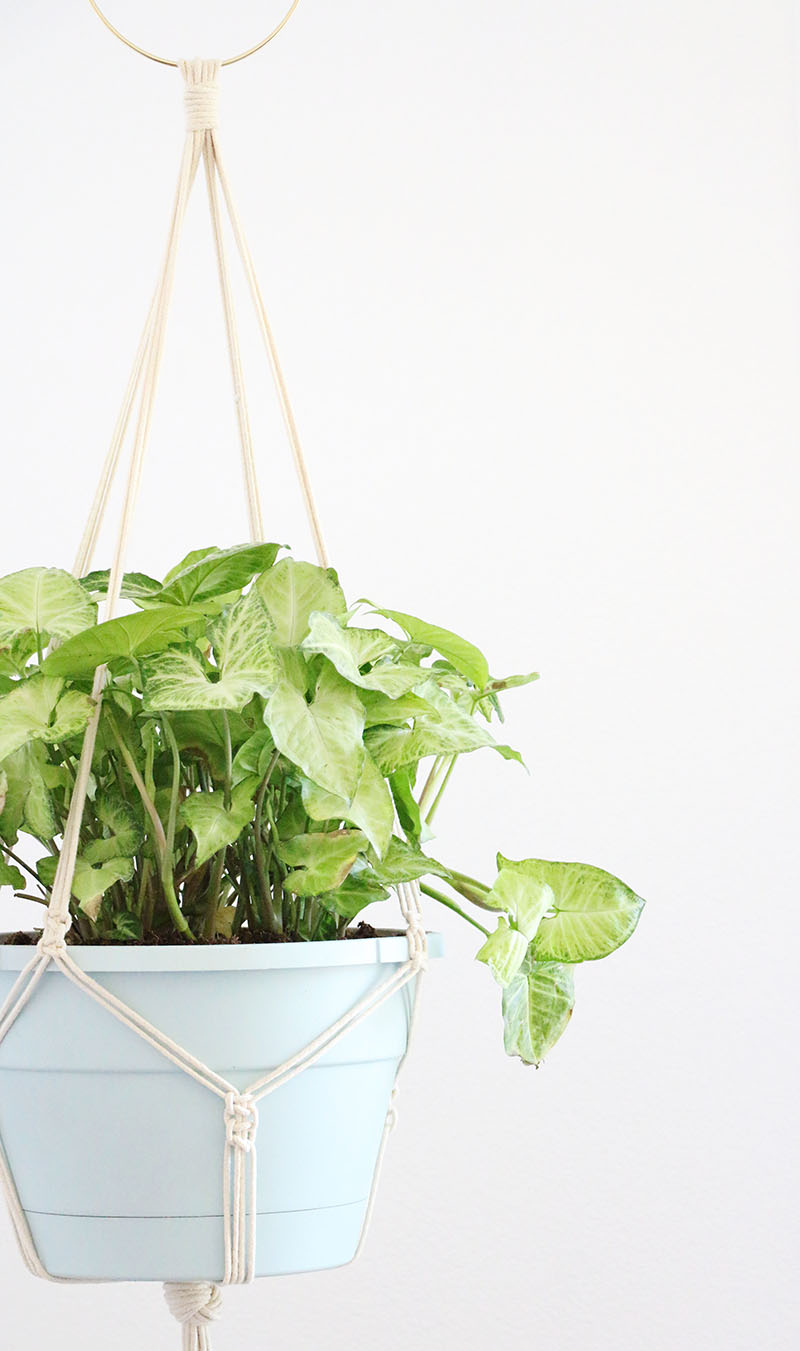
To finish off your DIY macrame plant hanger, you will need to tie all of the cords together with one final knot. Measure how far below your second row of knots you want your final knot to be. I placed mine about 7 inches below. Loop all of the cords together and pull through to tighten and secure the knot. Trim cords to even out the ends.
STEP SEVEN. INSERT PLANTER AND HANG.
All that’s left to do is insert your planter and hang it up. Take care to carefully sort your plants’ branches between the groups of cords and make sure that the hook you hang your planter from is securely attached to the ceiling and able to handle the plant’s weight.
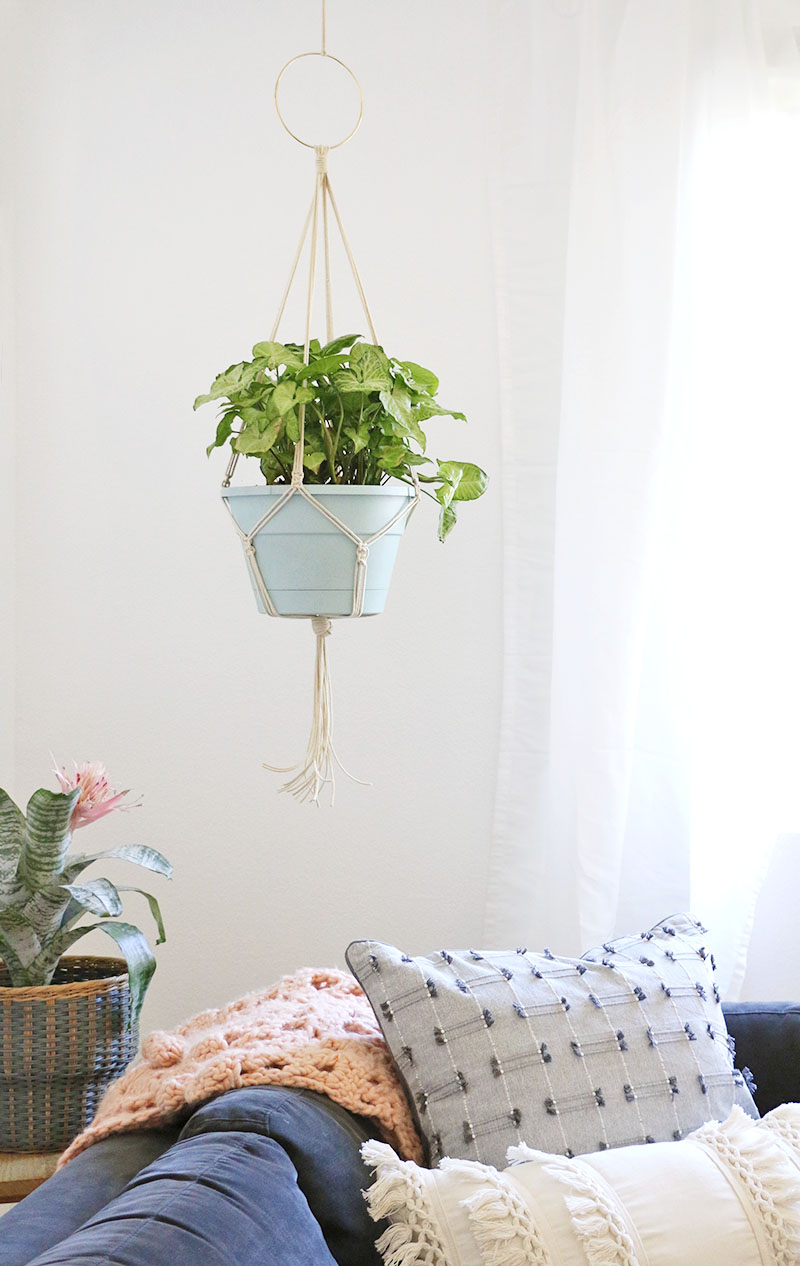
I am loving this handsome little fellow hanging in the corner of our family room. He is really brightening up the place and making it feel more homey. But he really needs a name – any suggestions?
Have you guys tried macrame yet? Would you give this simple little macrame plant hanger a try? If you do – I want to see it! You can share your photos to my facebook page or tag me on insta. Until next time –
Happy Making!

Komentar
Posting Komentar